Sunday, January 31, 2010
Mirror Reflection
This tutorial is inspired by an Adobe image. Adobe likes to use gradients in its backgrounds. The background on the image is a radial gradient with two colors a blue and black.
The mirror reflection effect on the lettering is not difficult. I used the Fireworks: mirrorReflect tutorial as my guide. You can click on the link and follow along or use my steps.
1. Create a new fireworks image with a black background. Then, add a rectangle with a radial gradiant. You can expand the rectangle or shrink it so as to give your gradiant the right look.
2. With the Text Tool type in the words you wish to use. Select the text and then choose Modify from the top menu. Choose symbol and name it if you wish.
3. Now we are going to duplicate the newly created symbol. To duplicate select the symbol and choose cntrl + shift + D. Don't worry if you don't see a change yet, the duplicate layer is laying right on top of the original layer.
4. In the top menu choose Modify, Transform, Flip Vertical. Now that your duplicate symbol is flipped, move it with the selection tool below the original symbol.
5. Now we need to tweak the reflection. Select the duplicate symbol that is the reflection. First, with the skew tool skew the bottom of the symbol out, and then with the scale tool flatten the bottom.
6. Now that the reflection is the right shape, we need to reduce the opacity in the properties panel. Next let's fade the reflection by going to Commands, Creative, and Fade. Select the upper right hand fade.
7. Finally, spice up the lettering with Styles.
Sunday, January 3, 2010
playing with fireworks hue and saturation
This article is a rework of an earlier article by breakdesign.blogspot.com.
Select an image.
Filters ->Adjust color -> Hue / Saturation
Andy Warhol
Original Photo
Pink
Hue -40
Saturation +20
Purple
Hue -110
Saturation +10
hot yellow
hue 0
saturation +100
Select an image.
Filters ->Adjust color -> Hue / Saturation
Andy Warhol
Original Photo
Pink
Hue -40
Saturation +20
Purple
Hue -110
Saturation +10
hot yellow
hue 0
saturation +100
let it snow
Adding snow to a web page is always a fun thing to do when winter comes.
Up until now, to create snowfall on a web page I have used Flash. Today, however, I came across a web page that uses Javascript to accomplish the same feat.
Here is the link to Schillman's site. Schiller has also created a smashing light bulb effect that is way too cool.
The process that Schiller uses is simple: link to a javascript in the head section, then source the javascript in your server. But, suppose you want to create this effect in your blogger file. Blogger doesn't allow javascript to clutter up its server. This means you can't post the javascript in the body section. Instead, use an alternate server that has the js code already loaded.
The answer was given by another blogger, Interestingwebs.blogspot.
His tips include keeping the javascript short, one line usually. the link for the snowfall that he provides is:
(script src="http://snow-effect.googlecode.com/files/snow.js" type="text/javascript")
(/script)
* note. I am changing the open and close tags to a parenthesis so that it shows up in blogger.
Put this code in the of your blog html and watch it snow.
Saturday, January 2, 2010
background images
Well, this is a little frustrating. I tried to put a background pattern into the content area of the blog. It worked and then when I tried to change the image it didn't. The rule to remember is always save your template in a separate file first so that if you screw up as I did, you can always go back.
I will come back to this later to sort it out. I do need to remember the steps.
First, there is information on how to upload an image directly into blogger without using shutterfly. See Blogger Tools.
In summary, the steps are create a new post, upload your image, look in the html, and copy the href. Next edit the layout and add
wrapper
{
background-image:url('http://4.bp.blogspot.com/_wa6zL1GRiOs/SkS13Dw5_WI/AAAAAAAADEo/vXbTj9bL7V0/s1600-h/add+new+picture+window.PNG');
background-repeat:repeat;
}
The only thing left to do is delete "s1600-h" from the http. Save.
lesson one - filters
Using the blur filter in photoshop and fireworks is easy.
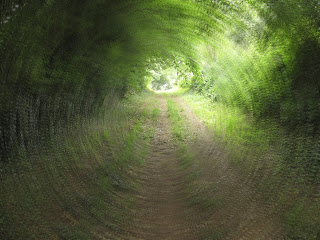
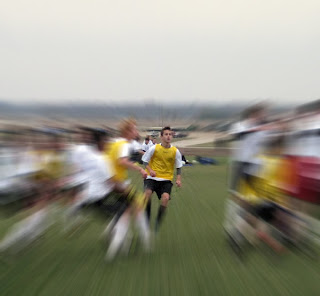
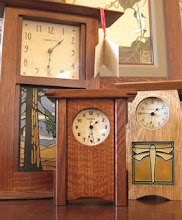
In the following examples I will apply a radial, zoom, and gaussian blur filter to three different images.
The photograph to the left is a country path in Graffign-Chemin, France. The path is one that my ancient French relatives used to walk when going to the fields to work. I have applied radial blur to give the photograph a time lapse effect. Remember Austin Powers zipping back in time?
The effect works in sports shots also. Use a zoom blur to focus attention. Here is Will waiting for the ball with all the action focused on Will.
Thanks to myJanee.com for the lesson.
1. Duplicate the picture in a new top layer. (How to.)
2. Lock the background image.
3. On the first layer, select mask.
4. Select the brush tool, and with black chosen paint a reveal in the center of the picture where you want the image to be clear.
5. You are done.
You can also use a Gaussian blur for an overall blur effect.
Movie makers use this effect to isolate a subject. Photographers use the Gaussian blur when focal stops don't do the trick.
Remember that with all of these filters, you are creating two layers. The background or bottom layer remains untouched. The second or top layer has the filter applied to it. The layer is then masked and the brush tool wipes off the area to be revealed.
Subscribe to:
Posts (Atom)